And now for the exciting conclusion to my “How I Pack” series!
In Part 1, I discussed my overall strategy for long-term travel, namely carry-on only, and how I went about putting that into place.
In Part 2, I documented how that strategy plays out item-by-item in terms of what I choose to carry in my bag and why.
Here in Part 3, I’ll put the two together, illustrating how my choice of backpacks and gear combine on the daily to make me compact, prepared, and most of all, organized.
For those who have been waiting patiently for me to show how I use packing cubes to bring it all together, consider this post my promise fulfilled. I think it’ll be worth the wait.
A FIRST ACKNOWLEDGMENT
Before I begin (suspense!!) I need to acknowledge two important contributors to my approach.
First is “The Life-Changing Magic of Tidying Up” by Marie Kondo, a wonderful (and surprisingly controversial) book about how to live more contentedly with less stuff.

It contains Ms. Kondo’s time-tested process – called The KonMari Method, or KonMari for short – for transitioning from the modern “affluenza” state of being overwhelmed with belongings to owning only what is necessary, or really, treasured.
Along the way, it offers reasons why many people, including me, often own more than they need or want, and explains so graciously why it’s OK to let go.
But most powerfully, at least for me, I think it quietly makes the case that our physical belongings are spiritual things, and that our relationship to our stuff is worthy of as much care and thoughtful intention as our relationship to, for example, our diet, our loved ones, and our hopes and dreams.
I read it in the summer of 2015 while on a month-long trip to Europe, and following the KonMari process when I got home contributed to the changing course of my life that led me here today. The book directly caused an event, memorialized here, that will forever stand as a deeply significant turning point for me. Let’s just say that I had something I needed to let go of.
That event, in turn, led to me being here now, on this train to Sapporo, Japan, on the island of Hokkaido as I write these words. Not to mention every stop I’ve made prior to being here, and every step to come.
I realize I have not fully surfaced how I see the key events of my life interconnecting. But it is no accident why I am here, doing what I am doing. I hope regular readers can see how I am revealing those pieces one by one, post by post.
Returning to the discussion at hand, Ms. Kondo’s book also helped me understand how to do more with much less on the road. For example, after merely beginning the KonMari process at home, I reduced the clothes in my closet by 70% to only the things I really wore, and enjoyed. This was before I had any idea I’d be traveling.
Then once I purchased my bag and all the things that would go in it, I felt comfortable that I had everything I really needed. Why? Because I had already become accustomed to owning, and thus needing, less!
Applying the KonMari process in my preparations, I didn’t just buy things because they sounded necessary, or for those “But what if… ?” situations. Instead I thought sincerely about each purchase and then checked with my intuition to make sure whether something belonged with me or not.
This took time and effort, especially being honest with myself about what I wanted to buy and why, and whether or not I really needed something. I had to say “No” to myself a lot. But the result was that I felt good about everything on my back when left San Francisco.
I also use Ms. Kondo’s process from time to time to make sure things stay that way. Consequently, I never have to second-guess my pack or what’s in it.
This is a happy feeling, because I don’t feel underprepared on one hand, nor do I feel resentful schlepping around more than I need, which, sadly, I see far too many travelers doing far too often.
A SECOND ACKNOWLEDGMENT
My second acknowledgment is to the Universe, or whatever force(s) you personally recognize as higher than the human cognitive mind: intuition, luck, guardian angels, the Higher Self, cargo gnomes, or what have you. Because my pack practically assembled itself.

It’s said that genius is 90% perspiration and 10% inspiration. Though I wouldn’t necessarily call my pack “genius”, I feel like my critical first packing effort was closer to 25% perspiration and 75% inspiration.
When I laid out all the pieces in my room, less than a week before I left (i.e., crunch time) I remember feeling a little something like, “Oh sh-t. How is this all going to work??”
I bought packing cubes in a way that I thought might be correct, which I’ll show in a second. But until I put the things in the things, and then in the bigger thing, I really had no idea. Then during the assembly process, my packable North Face jacket almost disrupted everything. But I solved that pretty quickly.
Between those two points of effort, putting the pack together felt surprisingly effortless, like being in a “flow” state.
Maybe I realized that my tendency to over-analyze could ruin my day? Maybe I “let go” and let my hands do the rest? I don’t remember.
But what emerged is the result of a co-creative process. And since I can’t take any real ownership of it, I think it might be part of my responsibility to acknowledge this and document it as transparently as possible in the hopes that it inspires someone else to take a similar leap.
PART 1: PACKING CUBES (HOORAY!)
The secret to my success lies in a little game called Tetris.
Going into this, I knew 3 things:
1) I wanted all my clothes in packing cubes, not loose in the pack’s main compartment the way most people pack suitcases.
When going on a single-stop vacation suitcase-style is fine, because in one private room for multiple days I can set down my suitcase, open it up, and forget about it.
But as a backpacker moving shared rooms once a day, sometime for days at a time, the idea of digging through my pack for a week to find underwear or t-shirts at the bottom – because that’s where I put it when I packed last – was not appealing.
Packing cubes are an extra step in the packing process, but they save a ton of time when used effectively. (There are other bonuses, as well, which I’ll discuss at the end.)
2) Obviously, I couldn’t carry more than would fit in the bag. I also didn’t want to carry too much less.
If I mindfully decided on 44 liters, might as well make use of it, right?
3) The more intuitive I could make the process, the better.
I didn’t want to be awake in a hostel at 4am, exhausted and packing for an early flight, and have to sort things out on an ad hoc basis. As I said above, if someday I’d be kicking myself for putting my t-shirts at the bottom one week, then when I packed I’d strategize for how to do better the next. Yes, even at 4am.
This would drive me absolutely crazy, because my circumstances change frequently. But it’s something I would totally do. So I needed to make my pack “Will-proof.”
In setting these three requirements, the consequences were that the packing cubes would have to:
(a) Contain everything
(b) Occupy almost the total volume of my pack
(c) Fit together in a consistent way
With me so far?
Well, here’s the problem. Most packing cubes come in sets of varying sizes: small, medium, large. They’re designed to organize socks, pants, shirts, etc. in appropriately-sized containers. What they’re NOT designed to do is fit together in a specific 3-dimensional space, like blocks, or a puzzle.
This makes sense because for most people, optimizing the use of space is not as big a concern as it is for me. And because 3D spaces (also known as “luggage”) come in so many variable shapes and sizes, it wouldn’t be possible to design a set of interlocking packing cubes without designing them specifically for the luggage involved.
(You’re welcome, luggage designers! Comment below and I’ll let you know where to send the checks.)
So if the solution for my needs didn’t exist, I had to figure it out myself. And that’s what I did.
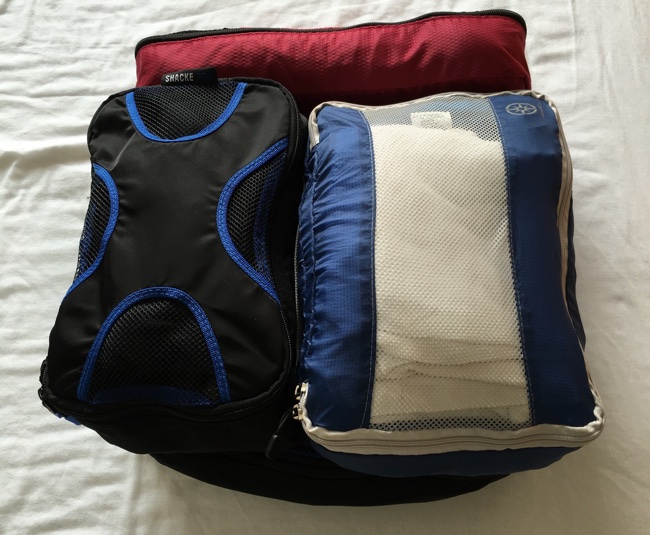
Thus, after trying a bunch of different combinations to find the optimal “fit” for my pack, I ended up with the following 4 cubes:
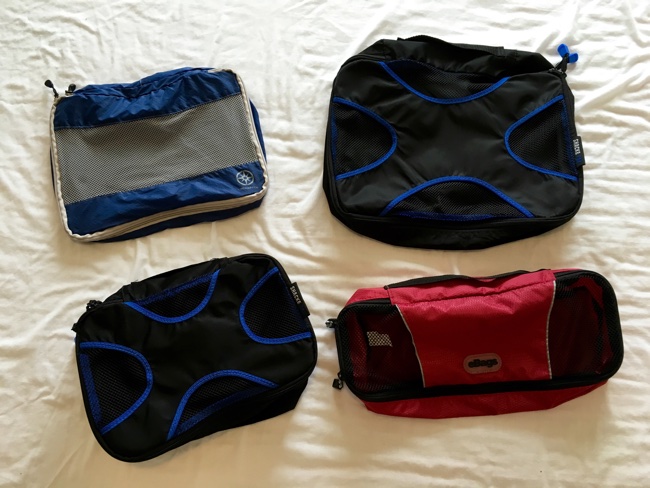
Two came from my original Shacke Pack set. The other two I had to piece out from other sets, and donate the remainder.
These four simple, lightweight, inexpensive tools make possible everything I’m about to show you. I don’t know if it’s genius that it works so well, but it certainly is fortunate.
PART 2: PUT THE THINGS IN THE THINGS!
Unbeknownst to many, there’s a great debate raging on the Internet right now that is perhaps more significant than Republican vs. Democrat, In ‘n’ Out vs. Shake Shack, or even Berenstein vs. Berenstain. That debate is folding vs. rolling clothes for travel. Some people swear by one technique as making the best use of space. Others prefer the alternative.
Personally, I’m a roller. But I fold too.
What I’m saying is, I go both ways. Depending on the circumstance.
*ahem* Moving along…
Now comes the fun part: wonky photos! This is exactly what I would do, if I were starting from here, which is everything unpacked:
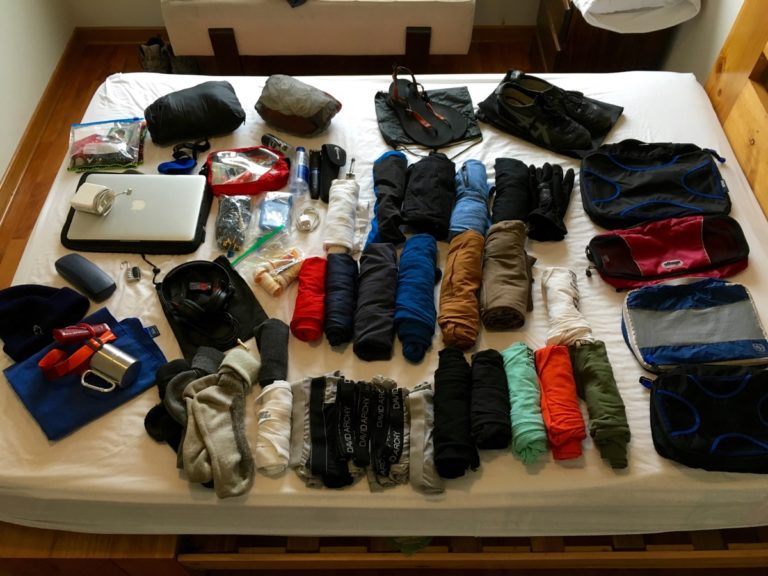
First, all my outdoor stuff goes together, in the long, red packing “rectangle.” Since I use this stuff least often, and only in specific circumstances, best to put it together.

Next, pants! Rolled. Notice there’s only 3 pairs in here. Because I’m always wearing one of them. Almost always… 😉

Now underwear. This is the first instance of roll+fold. My underwear is rolled in the bottom of the cube, and my socks and pajamas are laid flat on top.
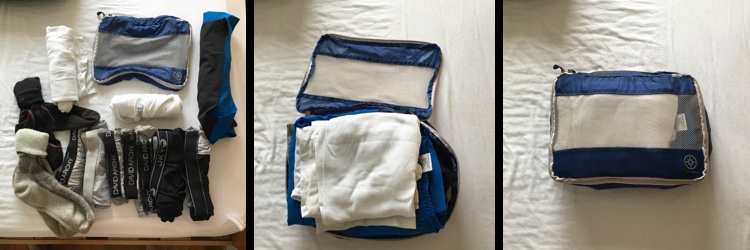
NOTE: I also solved the problem of how to know which pairs of underwear are clean, without the “sniff test.” (Come on, you know you’ve done it.)
I roll clean underwear with the waistband on the outside, like in the photos. Used underwear I roll with the waistband on the INSIDE. So I can tell at a glance and in the dark, by feel, how many pairs of clean underwear I have available.
I’m SUPER proud of this!!
Moving on… Shirts. Same as underwear. Some are rolled, and some are folded flat on top.
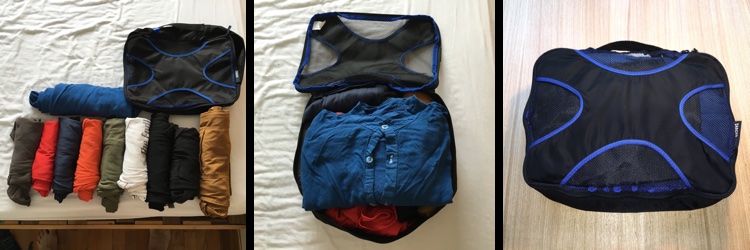
Et voila! Now all my packing cubes are full.

PART 3: NOW PUT IT IN THE BIGGER THING!
OK, now let’s put everything into my pack. Again, this is all from a state of totally unpacked, as if I were living in a house for a month and got comfortable.
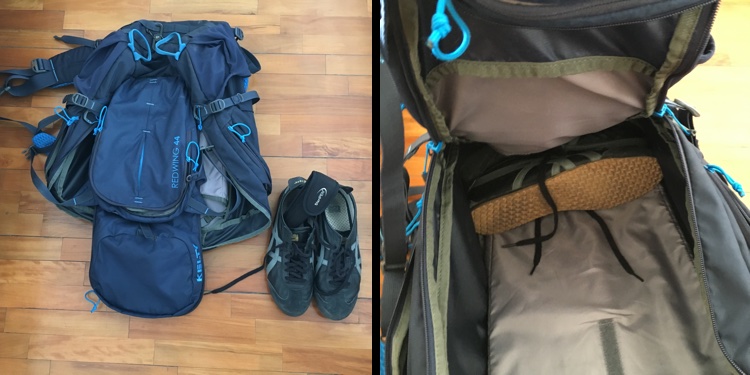
First I take my SteriPen, and put it inside one of my Onitsuka Tiger dress shoes. Those shoes then squeeze down at the bottom of the pack, laces-to-laces, so they stay clean.
Then I put in the packing cubes. And I put them inside my pack the same way, every time:
1. Put the big, heavy Shirts cube in against the back. (This is proper outdoors backpacking technique, keeping the heaviest items closest to the body.)

2. The small Pants cube goes at the bottom, by my shoes.

3. The Underwear cube goes above it.

4. Then on the right, I slide in the long rectangular Outdoors cube to complete the fit.
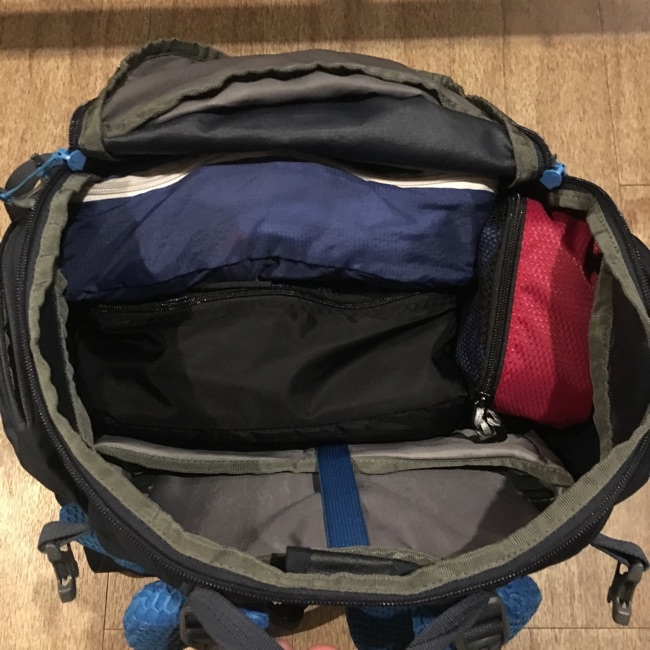
TETRIS, BABY!!!
Now let’s all jam out to the theme song together…
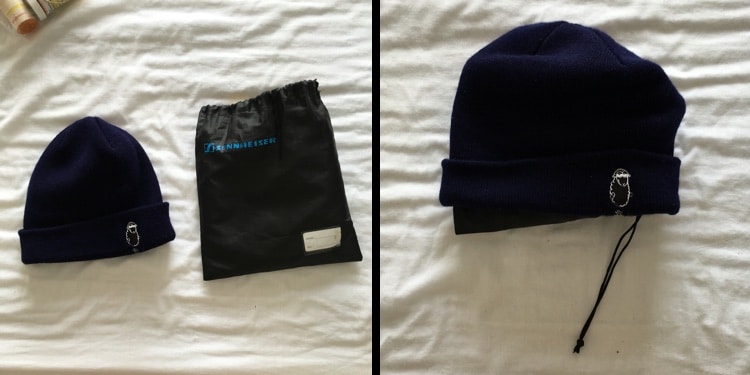
While still jamming, I take my headphones bag, and stuff it into my beanies.
With the bag zipped up and the cubes inside, then I slide the laptop in its case into the laptop sleeve (left – so great!) and put my beanie/headphone bundle and some other assorted items on top (right).

Jackets transform into “ball mode”, and then get tucked into the outer hip pockets of my bag! Now, I have both my cold-weather layers easily available when I need them. (The North Face jacket was the biggest win of the two, since I couldn’t find space for it inside.)

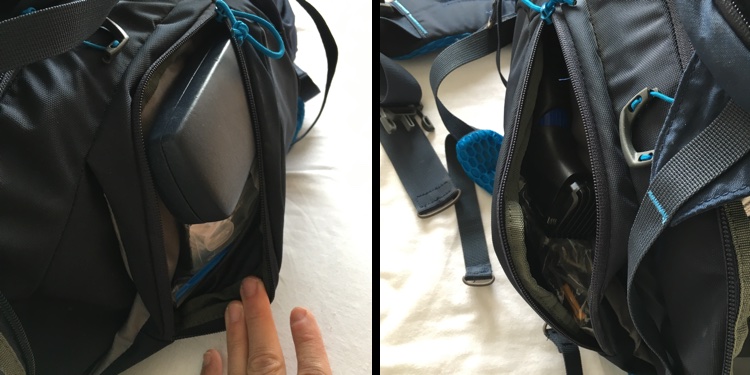
In one “wing” pocket (left), I put my glasses and assorted medication. In the other, I put my electric shaver and assorted cables (right).
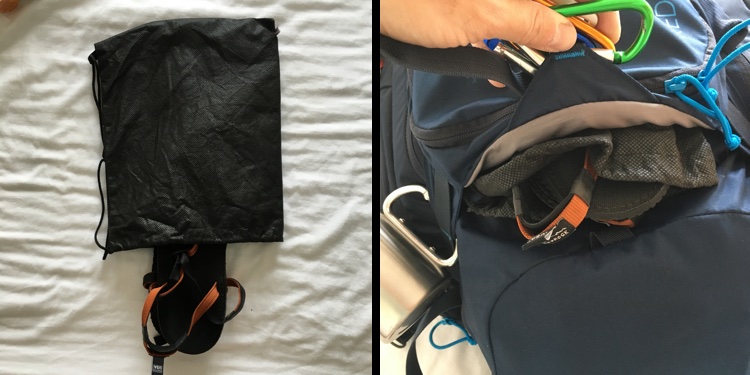
Sandals go in a bag I got in a guest house, and fit nicely into a flat pocket on the back of my pack.
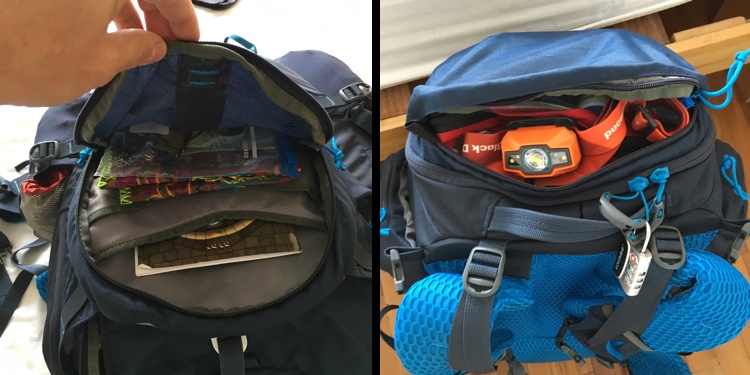
My sacred objects go in the front pocket (left), and my toiletries and headlamp go in the top “brain” pocket (right), so if I arrive late at night, I have easy access to everything I need to get ready for bed in the dark, and if necessary I can sleep in my clothes without having to open my pack.
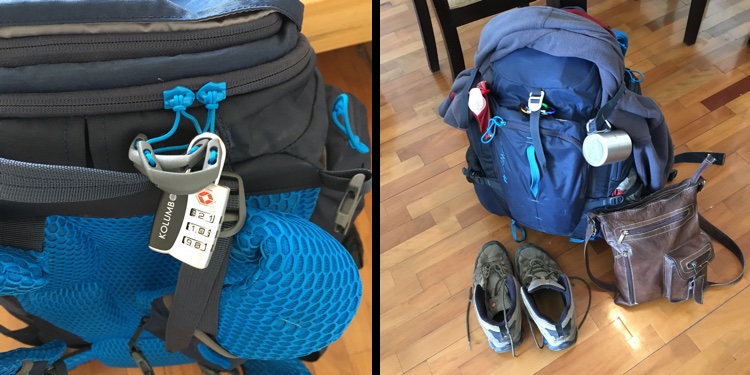
Then when traveling I lock up the pack with a travel lock (left – better than nothing!), and clip my travel water bottle and travel mug to the outside (right), and also strap my hoodie over the top of the bag in warmer climates. Then I grab my shoulder bag and we’re done!
Or better yet, I actually look like this:
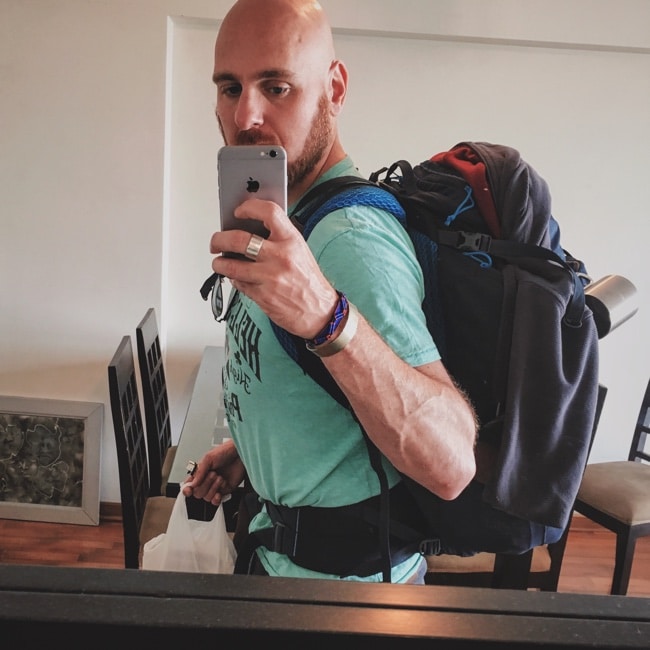
Which was taken right after I took all these pictures and was checking out of the same Airbnb.
But really now, most of the time when traveling between destinations, I look like this:

And there you go! That’s how I get from zero, to moving!
ADVANTAGES TO MY APPROACH
A lot of people I’ve met on the road have watched me do this process with great fascination, and encouraged me to write about it. I didn’t feel it was all that interesting, until I set about describing it. At which point I realized hey, this is actually pretty cool! And it was totally worth all the time and effort I put into perfecting it, documenting it, and writing it up.
So, in closing, let me share some of the advantages to this approach:
1) It’s totally mindless.
At this point, 9 months in (!!!) I can run this process in my sleep, which is the idea. No, I can’t just ball everything up and throw it in my bag loose, so I do have to plan ahead for time to pack before moving locations. But it doesn’t take that much mental energy or, now that I’ve got it down, too much time either.
In other words, I succeeded in making it “Will-proof”! If you were me you would know what a big deal this is.
2) When I arrive at my destination, I have “shelves.”
A big problem for backpackers at hostels is how to organize their belongings for use, without exploding all over the room.
For example, in Japan I’ve stayed at a lot of “capsule hotels”, which are essentially racks of enclosed bunk beds. These capsule hotels also have rather narrow walkways between beds.
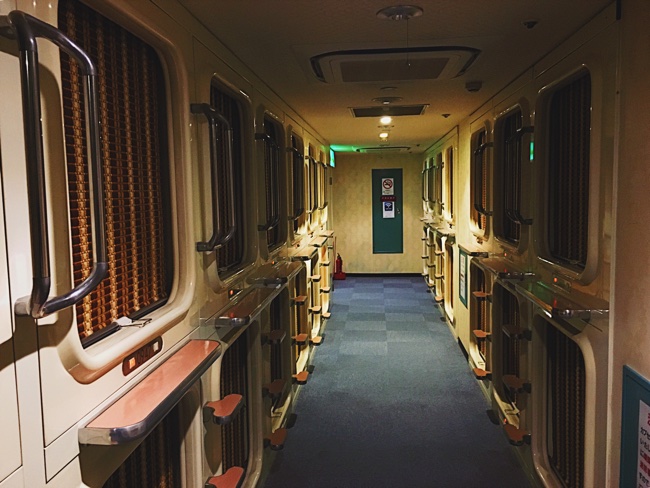
So if I want to unpack and lay out clothes, I really have nowhere to do it.
But with packing cubes, I can stack them up at the foot of my bed, or sometimes even in my bed itself, and have access to all of my things without making a mess. In addition, I can unpack instantly. In removing just 4 quick bundles, I can find any clothing item without having to dig or take too much stuff out.
3) I know where everything is, all the time.
Everything has a place, and every place has its thing. This is huge for me.
Because if I need my electric shaver, for instance, it’s in the side pocket above the black jacket. (Because “black” = “electronics.” Yes, I know. <3) If it’s not there, it’s nowhere else. This has proven remarkably effective, so far, for not losing things.
Same with any clothing item. All my underwear, shirts, pants, etc. are all in the same location from destination to destination. There’s no guessing.
But most of all, for a “homeless” guy moving around day to day, it’s the closest thing I’ve got to my own space, organized in my own way, with my things in it.
Think of it like my own tiny, tiny version of a home…
My one stable thing in a world-size sea of change and motion. <3
Thank you so much for coming with me on this journey.
Cheers.
 Do you know a traveler who might benefit from this post? If so, please share! Questions or comments? Join the discussion below. And if you’re a new visitor, please subscribe in the blue box on the right on web, or at the bottom of the page on mobile.
~ Will, The Lost Pilgrim


")
7 Comments